


I noticed that the ae (after effects) workflow is not widely spoken about, even though we see everyone’s setup in each tutorial. I definitely did scramble to find my way in the early stages of working in ae, but now that I have a solid base, safe to say that what I do has worked for me! Hopefully you can integrate something new in your workflow after reading 🙂
organize*1000
Fortunately and unfortunately, my comps have become more complicated than the typical four items. It starts to become more chaotic if I just throw everything in, so this is how I organize! This keeps my workflow more streamlined.
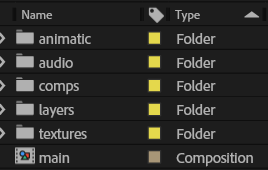
Everything gets imported in and sorted accordingly. Textures go in textures, audio goes in audio. I normally work with illustrator, so when ae creates the additional layer folder (since I select create comp), it goes in the layers folder. The ‘main’ comp is allowed to exist outside of the folders for easy exporting selection.

This also means every file outside of ae gets a place. Otherwise- moving the files around while the project is in the works makes ae not happy…
label label label
Everything literally has a name. This habit is forever instilled into me by my design professor. In a way, I have to thank him, ‘cus otherwise I would’ve been eternally frustrated. Why label? With no name, now I gotta figure out what it does, which wastes time. here’s how I label 🙂
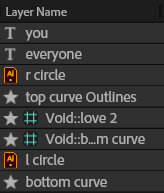

Again, everything gets labeled. They also get grouped according to location and type. Sometimes there are exceptions to the rules, but primarily that’s what I follow. From top to bottom:
- text layers are together since the motion is the same (mirrored), despite being on opposite sides of the frame.
- this is a location group: r circle, top curve, and void::love2. r circle and top curve are parented to the void, as the void controls the motion (it is a plugin version of a null!)
- the voids are together because they too are like the text layer- both have the same motion, just mirrored
- l circle and bottom curve are a location group, just like their homies w/similar names.
these plugins put in the WORK
I don’t have much money to spend on software (as I am a broke college student), but these are free and save me SO much time. I assigned them both keyboard shortcuts so I can easily access them on the go!
easecopy + easepaste
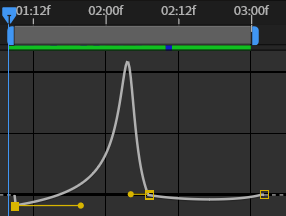
no more guessing on how to recreate the curve!
I love this guy. This essentially allows you to copy the graph curve of the keyframes and paste it exactly on other keyframes. Basically saves trying to recopy a graph motion by hand. There’s also the option to copy the values, but I don’t use that as much compared to the ease one.
void + null
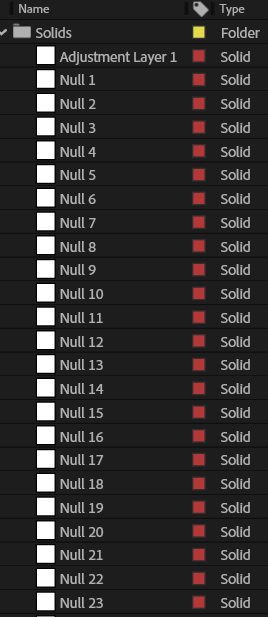
look at allllllllllllllll these nulls… no more.
I found this more recently, but this plugin frees up the file. Adobe nulls and adjustment layers annoyingly take up storage space. With this, they don’t!
That’s all for my current ae workflow as a student. Thanks for reading and I’ll see you in another rendition of motion talks!

Leave a Reply